May 17, 2026
How to Make Espresso at Home
Some links in this guide are affiliate links. If you buy through them, Pulled may earn a commission at no extra cost to you. Our recommendations are based on editorial judgment and coffee culture knowledge, not commission rates.
Make the coffee, then pull the cafe. Download Pulled.


espresso at home is a skill before it is a machine. The machine pushes hot water through a bed of coffee at pressure, and that part works much the same in a 500 dollar box and a 6,000 dollar one. What changes the cup is everything around the machine: how fresh the beans are, how finely and how evenly they are ground, how carefully the dose is weighed, and how well you read the shot and adjust. This guide covers the whole process, from the gear that actually matters to pulling a shot worth drinking, and the short feedback habit that gets you there.
The short version
- A good grinder matters more than an expensive machine. Budget for the grinder first.
- Use beans roasted within the last three weeks. Stale coffee cannot be fixed downstream.
- Weigh everything. A doubleshot is roughly 18 grams of coffee in and 36 grams of espresso out.
- Aim for that shot to run in 25 to 30 seconds. Faster, grind finer. Slower, grind coarser.
- Taste, change one variable, pull again. Espresso is a feedback loop, not a single recipe.
What you actually need
Four things stand between you and good espresso: a machine, a grinder, fresh beans, and a scale. Most people spend the most on the machine and the least on the grinder. Reverse that instinct.
The machine builds the roughly nine bars of pressure that define espresso, holds the water at temperature, and steams milk. A capable home machine starts around 500 dollars. The Breville Bambino Plus is the common entry point. It heats in seconds, steams milk well enough to learn on, and pulls a genuinely good shot once the grind is right.
If you would rather learn the mechanics by hand, a manual lever maker strips out the electronics and puts the pressure under your own arm. It asks for more practice and it rewards the practice with a clear sense of what pressure and flow actually do.
The grinder is the part that decides whether any of this works. Espresso needs a fine, even, repeatable grind, which means a burr grinder built to reach espresso settings. A blade grinder cannot do it: it chops unevenly and cannot go fine enough. The Fellow Opus is a reasonable first burr grinder that reaches espresso fineness without a professional price.
Then beans, and a scale that reads to a tenth of a gram. The scale costs about 20 dollars and it is not optional, because dose and yield are the two numbers espresso runs on. A fresh espresso blend gives you something forgiving to learn on.
Make the coffee, then pull the cafe. Download Pulled.
The coffee and the water
Espresso has two ingredients, and both matter more than any setting on the machine.
Beans first. Buy whole beans with a roast date printed on the bag, and use them between one and three weeks past that date. Coffee gives off carbon dioxide for days after roasting, and very fresh coffee gurgles and channels under pressure, which makes the shot hard to control. After about three weeks it flattens and goes dull in the cup. A medium to medium-dark roast labeled for espresso is the easiest place to start, because it is forgiving of small grind errors. Buy a 12 ounce bag rather than a five pound one. You want to finish it while it is still fresh.
Water second. A shot of espresso is more than 90 percent water. Hard or heavily chlorinated tap water both tastes like itself in the cup and leaves scale inside the machine. Filtered water is enough for most homes. If your tap water is very hard, a purpose-made brewing water solves the taste and the scale at the same time.
Pulling a shot, step by step
What follows is a doubleshot, the standard at home. The numbers are a starting point. The taste at the end tells you how to move them.
Step 1: Weigh the dose
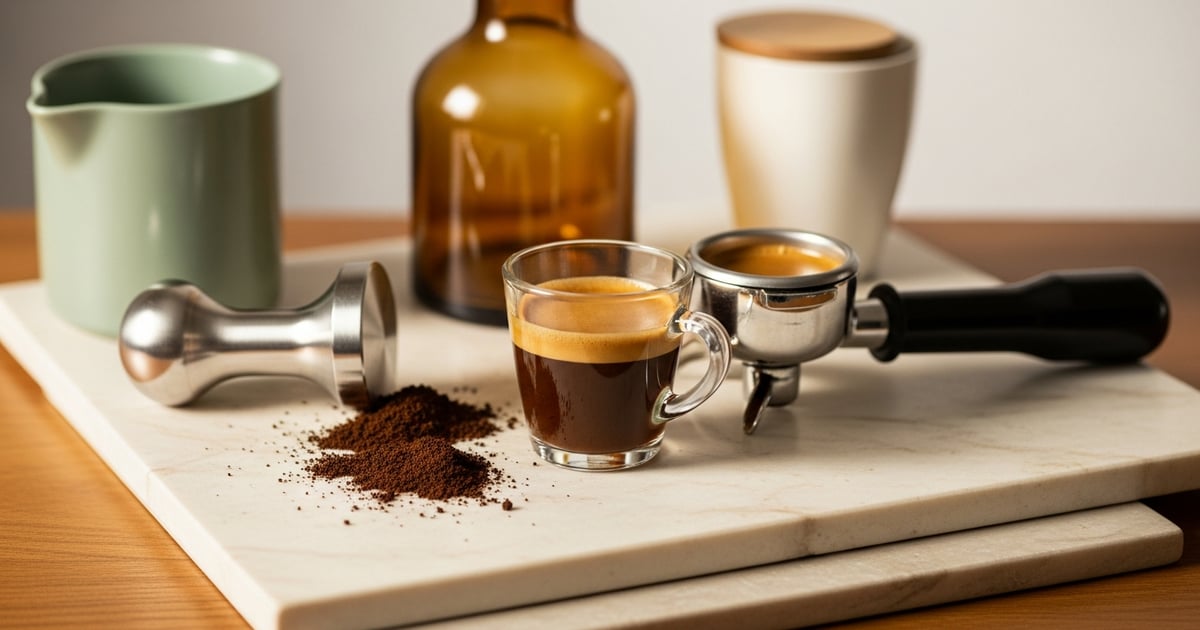
Set the empty portafilter basket on the scale and zero it. A standard double basket holds about 18 grams of ground coffee, though some baskets are stamped with their own figure. Weigh to that number every single time. Espresso is a ratio, and the ratio only means something if it starts from a dose you can repeat. Eyeballing the dose is the quickest route to a cup that is subtly different every morning for no reason you can name, which makes every other adjustment guesswork.
Step 2: Grind fresh, and grind fine
Grind immediately before you pull the shot. Ground coffee goes stale in minutes, not days, as the surface area meets the air. Set the grinder fine, finer than instinct suggests: espresso grind feels like powdered sugar with a faint grit, not like table salt. Grind straight into the basket. If your grinder delivers the grounds in clumps or unevenly, settle the bed with a gentle tap and a light stir using a thin tool before you move on. An uneven bed is the start of most bad shots.
Step 3: Distribute and tamp
The bed of coffee has to be level and even before you tamp it, or pressurized water will bore a channel through the softest spot and rush past everything else. Level the grounds first, with a fingertip or a distribution tool drawn across the surface. Then tamp straight down with steady, even pressure until the puck stops compressing. The exact force matters less than beginners think. Level and consistent matters far more. A tamp that goes in crooked leaves one side denser than the other, and that is a channel waiting to open.
Step 4: Lock in and start the shot
Wipe loose grounds off the rim of the portafilter so it seals cleanly against the group, then lock it in. Set your cup on the scale, zero it, and start the pump. Most machines open with a few seconds of lower-pressure pre-infusion that wets the puck gently before full pressure arrives, which gives the water an even bed to push through. Let it run, and start your timer when the pump does.
Step 5: Read the shot
Watch what comes out, because the shot tells you most of what you need to know. For the first several seconds the spouts only drip. Then the flow draws together into a thin, steady, honey-colored stream. Stop the shot when the scale reads about 36 grams, which is twice your 18 gram dose, a ratio of 1 to 2. Check the timer. From the moment the pump started you are aiming for 25 to 30 seconds. A shot that hits the right weight inside the right time is the target.
Pulled pays PayPal cash for every cafe visit you log.
Step 6: Taste, then change one thing
Drink it. If the shot ran fast, under 25 seconds, and tastes sharp, sour, and thin, it is under-extracted: the water raced through and pulled too little from the coffee. Grind finer. If the shot ran slow, past 30 seconds, and tastes harsh and bitter with a dry, scratchy finish, it is over-extracted: the water crawled through and pulled too much. Grind coarser. Change only the grind, pull again, and taste again. This loop is called dialing in, and it is the actual skill of home espresso. Every new bag of beans needs its own dial-in. After a week of mornings you will do it without thinking about it.
Step 7: Steam milk, if the drink calls for it
Most home espresso becomes a latte or a cappuccino. To steam milk, purge the wand, set the tip just under the surface to pull in air for a few seconds, then sink it deeper to spin the milk into a smooth, glossy whirlpool with no large bubbles. Stop at about 140 degrees, which is hot to the touch but not scalding. Wipe and purge the wand the moment you finish. Milk steaming is its own skill with its own guide, but the espresso under it is the part that has to be right first.
Common mistakes
Most disappointing home espresso traces back to a short list of errors, and each one is easy to fix once it is named.
Pre-ground coffee. Coffee ground at the store is going stale before you open the bag, and it is almost never ground fine enough for espresso. Whole beans and a burr grinder are not optional for this drink.
Skipping the scale. Dose in and espresso out are the two numbers the whole process runs on. Without weighing them you are changing inputs you cannot see and chasing a result you cannot repeat.
Chasing tamp pressure. Beginners fixate on how hard to tamp. Level matters. Force, past a reasonable firmness, barely does. Move that attention to grind size and to distributing the bed evenly.
Beans that are stale, or too fresh. Both ends of the range fight you. Coffee within a few days of roasting channels and gushes; coffee past about three weeks goes flat. One to three weeks off roast is the window.
A dirty machine. Old coffee oils turn rancid and the cup tastes like it. Backflush the group head on a schedule and wipe the steam wand after every use.
Variations once you can pull a shot
A clean shot is the base of most of the coffee menu, and the variations are mostly a matter of changing one number or adding one ingredient.
Ristretto and lungo. Stop the shot earlier, around a 1 to 1.5 ratio, for a ristretto: shorter, sweeter, more concentrated. Let it run longer, out to about 1 to 3, for a lungo: longer, lighter, and more bitter at the tail. Same dose, different yield.
Americano. Pull a normal shot and add hot water to the cup, roughly two to three parts water to one part espresso. It is the simplest way to drink espresso long, and the order in which you combine them changes the crema more than the taste.
Latte and cappuccino. Steam milk and pour. A latte is a shot under a larger volume of steamed milk with a thin layer of foam. A cappuccino uses less milk and more foam in a smaller cup, so the espresso reads louder.
Iced. Pull the shot straight onto ice, or over cold milk, and drink it before the ice melts the concentration away. A slightly finer grind helps, since dilution is coming either way.
14 day free trial. No credit card required.
Common questions
Can you make espresso without an espresso machine?
Not true espresso. Espresso is defined by roughly nine bars of pressure, and a Moka pot or an AeroPress brews a strong, concentrated coffee at much lower pressure. Those drinks are good on their own terms, and they are not espresso. A pump machine or a manual lever maker is what produces the real thing, crema included.
Do I really need an expensive grinder?
You need a burr grinder that reaches espresso fineness and holds a consistent setting, which starts around 150 to 200 dollars. You do not need the most expensive grinder on the shelf. You do need to avoid a blade grinder, which genuinely cannot make espresso, because it cannot grind fine enough or evenly enough.
Why is my espresso sour?
Sour, sharp, thin espresso is usually under-extracted: the water moved through the puck too fast. Grind finer so the shot runs slower, and check that your beans are at least several days past their roast date.
Why is my espresso bitter?
Harsh, bitter espresso with a dry finish is usually over-extracted: the shot ran too slow. Grind coarser. A very dark roast and a machine that has not been cleaned both push the cup the same direction.
How much caffeine is in a shot of espresso?
A doubleshot holds roughly 120 to 130 milligrams of caffeine, in the same range as a small cup of drip coffee. Espresso tastes far more intense than drip because it is concentrated, but per serving the caffeine is similar.
Keep going
Once the shot is reliable, steaming milk is the next skill, and the grinder is the upgrade that pays off most. For cities where espresso is part of the daily fabric, the Rome coffee guide and the Melbourne coffee guide are both worth a slow read.
Make the coffee, then pull the cafe. Download Pulled.
Our Picks
What we'd buy on Amazon for this
Normcore · WDT Distribution Tool
Breaks up clumps in the basket. Two minutes saved per shot, no channeling.
$19.99
View on Amazon →Bodum · Pavina Double-Wall Glasses (Set of 6, 12oz)
The cafe glass for serving iced lattes, iced Americanos, and cold brew at home.
$40.99
View on Amazon →Baratza · Encore Conical Burr Grinder
The grinder most third wave roasters point new home brewers toward.
$149.95
View on Amazon →


Pulled may earn a commission on purchases. Cookie applies to all Amazon items in your next 24 hours, not just this product.
See all Pulled Picks →Keep going with Pulled