May 10, 2026
How to Make Cold Brew at Home: The Complete Guide
Some links in this guide are affiliate links. If you buy through them, Pulled may earn a commission at no extra cost to you. Our recommendations are based on editorial judgment and coffee culture knowledge, not commission rates.
Make the coffee, then pull the cafe. Download Pulled.


Cold brew is the simplest coffee method that exists. Coarse grounds. Cold water. Time. No heat, no equipment beyond what is in your kitchen, no skill curve. If you can pour water into a jar, you can make cold brew at home.
The hard part is getting it right the first time. Most first batches come out weak, or bitter, or watery, or strangely flat. None of that is your fault. It is the recipe you used. The ratio was wrong. The grind was wrong. The steep was wrong. One small variable was off and the whole batch tasted like a guess.
This guide fixes that. Three methods, the ratio that works, the grind that matters, the steep time debate, the storage rules, and ten mistakes to skip.
What is cold brew
Cold brew is coffee that has been steeped in cold or room temperature water for a long time, then strained. That is the whole definition. No heat is ever applied. The grounds and water sit together for 12 to 24 hours and the water slowly pulls flavor, caffeine, and oils out of the coffee.
The result is a smooth, low-acidity coffee with a flavor profile that is almost the opposite of hot coffee. Hot brewing extracts brightness, acidity, and the volatile aromatics that give coffee its punch. Cold brewing leaves most of that behind and extracts the sweeter, rounder, heavier flavors instead. Chocolate, caramel, nuts, dried fruit, sometimes a faint vanilla.
People who do not like the taste of hot coffee often love cold brew. The acid that bothers their stomach is gone. The bitter edge that puts them off a regular cup is gone. What remains tastes more like dessert than breakfast. That is why cold brew has taken over summer menus and grocery shelves over the past decade.
Cold brew vs iced coffee
These are not the same drink, and the confusion drives baristas crazy.
Iced coffee is hot coffee, poured over ice. You brew a regular cup with hot water using whatever method you want (drip, pour over, espresso shot pulled long), and then you pour it over a glass of ice. The ice cools it down and dilutes it. The flavor profile stays close to hot coffee. Bright. Acidic. Aromatic. The ice softens it but the underlying drink is the same coffee you started with.
Cold brew is coffee that was never hot in the first place. The water and the grounds sat together at room temperature or in the fridge for 12 to 24 hours. The chemistry of extraction is completely different. Different compounds get pulled out. The acidity profile is lower. The mouthfeel is heavier. The caffeine content is usually higher (more on that later).
A flash chilled or Japanese iced coffee is a third option. You brew hot coffee directly onto a bed of ice that immediately drops the temperature. That preserves the aromatics that get lost when hot coffee sits and oxidizes, but it is still hot extraction. It is closer to iced coffee than to cold brew.
If you want a bright, complex, acidic iced drink, brew iced coffee. If you want a smooth, mellow, slightly sweet drink that you can keep in the fridge for a week, brew cold brew. They are different tools.
Make the coffee, then pull the cafe. Download Pulled.
What you need
The equipment list is short.
- A vessel that holds at least one liter, ideally with a lid. A mason jar, a French press, a pitcher, a glass carafe, or a dedicated cold brew maker.
- A way to separate the grounds from the water at the end. A fine mesh sieve plus a coffee filter, a French press plunger, a dedicated brewer with a built in filter, or a reusable nut milk bag.
- Coarse-ground coffee. If you have a grinder, grind it yourself. If not, ask the shop you buy beans from for a French press grind. (More on grind below.)
- Cold or room temperature filtered water. Tap water works if your tap water tastes good. If it tastes like the pipes, use filtered.
That is everything. You do not need a Toddy, you do not need an Oxo, you do not need anything you have to buy. A mason jar and a sieve will produce cold brew that is indistinguishable from the version a fancy maker produces. The dedicated tools are convenience, not quality.
Method 1: The mason jar method
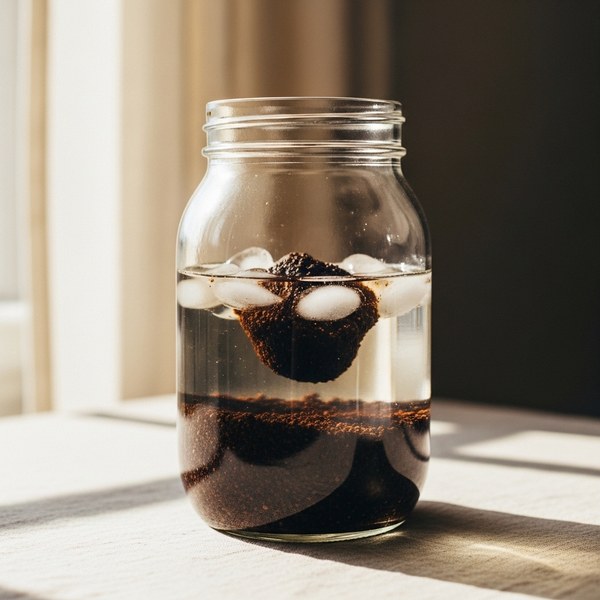
This is the cheapest, simplest, and most foolproof way to make cold brew. If you have a quart-sized mason jar, you have a cold brew brewer.
Step 1. Add one cup of coarse-ground coffee to the jar. That is roughly 100 grams if you have a kitchen scale. If you do not have a scale, a generous one-cup measure is close enough.
Step 2. Pour in four cups of cold filtered water. That is one liter. The ratio you just used is 1 part coffee to 10 parts water by volume, which makes a strong concentrate.
Step 3. Stir the jar thoroughly. The goal is to wet every ground. Dry pockets ruin a batch. Use a long spoon or a chopstick and get into the corners.
Step 4. Seal the jar with the lid and leave it on the counter for 12 to 16 hours, or in the fridge for 18 to 24 hours. Room temperature extracts faster. Fridge extracts slower and produces a slightly cleaner cup. Both work.
Step 5. Strain. Pour the contents through a fine mesh sieve into a clean container to catch the bulk of the grounds. Then pour that liquid through a paper coffee filter (or two layers of cheesecloth) into a final container. The second strain catches the fines that the sieve missed. Without the second strain the cold brew will taste muddy.
Step 6. Compost the grounds. Wipe out the jar. You can drink it now or move it to the fridge for later.
Step 7. Serve. This is concentrate. Dilute it one to one with water, milk, or oat milk over ice. If you want it stronger, dilute less. If you want it weaker, dilute more. The diluted drink keeps in the fridge for a week. The undiluted concentrate keeps for closer to two weeks if it is in a sealed container.
Method 2: The filter bag method
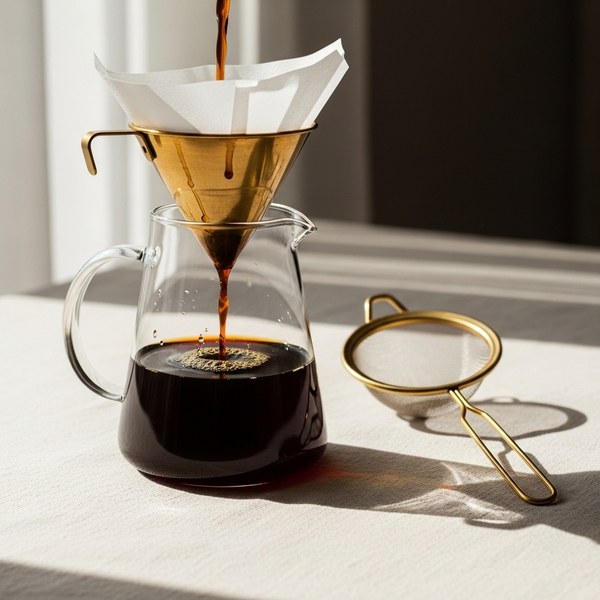
This is the cleanest method. The grounds never touch the final liquid, so there is no second strain, no muddy fines, no mess on the counter. All you need is a reusable nut milk bag or a disposable cold brew filter bag.
Step 1. Place the filter bag inside your pitcher. Fold the top of the bag over the rim so it stays open while you fill it.
Step 2. Pour one cup of coarse-ground coffee into the bag. About 100 grams.
Step 3. Slowly pour four cups of cold filtered water over the grounds. Let the water saturate the bed before you add the rest. Make sure every ground is wet.
Step 4. Tie the bag closed (if it has a drawstring) or just leave the top folded over the rim with the bag mostly submerged. The grounds need to stay in contact with the water. Cover the pitcher.
Step 5. Steep for 12 to 16 hours at room temperature or 18 to 24 in the fridge. Same window as the mason jar method.
Step 6. Lift the bag out of the pitcher. Hold it above the pitcher for a minute and let it drip. Squeeze gently to release the last of the liquid. Do not wring it dry because that will push fines through the bag and into the pitcher.
Step 7. Discard or rinse and reuse the bag depending on whether it is disposable. The concentrate in the pitcher is ready. Cover and refrigerate.
The filter bag method is the one most coffee shops use to make their batch cold brew. It scales up easily. A bigger pitcher and a bigger bag is all you need to brew a gallon at a time.
Method 3: The Toddy or dedicated cold brew maker
If you make cold brew weekly or daily, a dedicated maker is worth the counter space. The Toddy is the most well known. There are also options from Oxo, Hario, Bodum, and a few smaller brands. All work on the same idea: a vessel with a built in filter that lets you brew, strain, and store without the extra steps.
Step 1. Insert the filter into the brewing vessel and seat the stopper into the bottom drain. Wet the filter with a splash of water so it forms a seal.
Step 2. Layer coffee and water. Start with one cup of water at the bottom. Add half the grounds. Add three more cups of water. Add the rest of the grounds. Top with the remaining water. Do not stir aggressively. Layering produces an even extraction.
Step 3. Cap the brewer (if it has a lid) and leave it for 12 hours on the counter or up to 24 in the fridge.
Step 4. When ready, place the brewing vessel on top of the glass carafe and pull the stopper. The concentrate drains through the felt filter into the carafe over the next several minutes. Walk away. It does not need supervision.
Step 5. Cap the carafe. The concentrate is ready. Rinse the felt filter and store it in a zip bag in the fridge so it does not dry out between brews. Compost the grounds.
The advantage of a dedicated brewer is that the filter does a better job than a mason jar plus sieve. The concentrate is cleaner. The flavor is more consistent batch to batch. And the storage carafe is purpose-built so the cold brew sits sealed and stable for two weeks in the fridge. If you brew cold brew constantly, the time savings add up.
The coffee to water ratio
This is where most home cold brew fails. The ratio determines whether you are brewing concentrate (to dilute) or ready to drink (to serve as-is).
The two ratios that matter:
1:8 ratio (concentrate). One part coffee to eight parts water by weight. This is what most coffee shops brew and what every method above describes. The result is intensely strong and meant to be diluted 1:1 with water or milk before serving. If you drink it undiluted you will taste a lot of things, and most of them will not be pleasant.
Pulled pays PayPal cash for every cafe visit you log.
1:15 to 1:17 ratio (ready to drink). One part coffee to fifteen or sixteen parts water. The result is a finished drink at brew strength, no dilution needed. It is essentially regular-strength coffee, just made cold. Some people prefer this because it is one less step and the storage volume is smaller per drink.
Both ratios are correct. They produce different products. Decide which one you want before you start.
If you weigh by volume instead of weight, the rough conversion is this. One cup of coarse-ground coffee is about 100 grams. One cup of water is about 240 grams. So one cup of coffee plus four cups of water is roughly a 1:10 ratio by weight, which sits comfortably between the two ratios and produces a slightly less aggressive concentrate. That is the ratio used in every method above and it is the most forgiving starting point.
Once you have brewed a few batches, adjust. If your dilution at 1:1 tastes too strong, brew at a weaker ratio next time. If it tastes weak even undiluted, brew stronger.
Grind size matters more than you think
Cold brew uses a coarse grind. Specifically, the kind of grind you would use for a French press. The reason is mechanical, not chemical.
Cold water extracts coffee slowly. Slowly means hours, not minutes. Over 12 to 24 hours of contact, even a coarse grind has time to give up most of its flavor. Fine grinds, by contrast, would over-extract dramatically over that same period. They would also pass through the filter and end up suspended in the final liquid, making it gritty.
The visual reference for coarse grind is sea salt. Big, chunky, uneven particles you can clearly see. If your grind looks like sand or sugar, it is too fine and your cold brew will be bitter and muddy.
If you buy preground coffee, ask the shop for a French press grind. If you grind at home, use the coarsest setting on a burr grinder. Blade grinders produce uneven particle sizes, which means a mix of coarse and fine, which means inconsistent extraction. Burr grinders are better, but if all you have is a blade grinder, pulse in short bursts and try not to grind too fine.
Bad grind is the single most common reason a home cold brew batch tastes bitter or muddy. Fix the grind and most other problems go away.
Steep time and the 12 vs 24 hour question
Every cold brew recipe online gives a different steep time. Twelve hours. Sixteen. Twenty-four. Some go as long as 48. What is right?
The honest answer is that the right time depends on your water temperature, your ratio, your grind, and your taste.
Room temperature water extracts faster than fridge water. A coarser grind extracts slower than a slightly finer grind. A higher ratio of coffee to water extracts more aggressively. So a 12-hour room temperature brew with the standard ratio is roughly equivalent to an 18 to 20 hour fridge brew with the same recipe.
The practical guideline is this. Room temperature: 12 to 16 hours. Fridge: 16 to 24 hours. Anything past 24 hours starts to over-extract, regardless of temperature. You begin pulling bitter compounds that the slow-cold extraction would otherwise leave alone. The drink gets harsher and loses the smooth profile that cold brew is supposed to deliver.
If you brewed last night and you are not ready to strain in the morning, strain it anyway and refrigerate. The drink will be fine in the fridge for two weeks. You do not need to wait.
Concentrate or ready to drink, and how to dilute
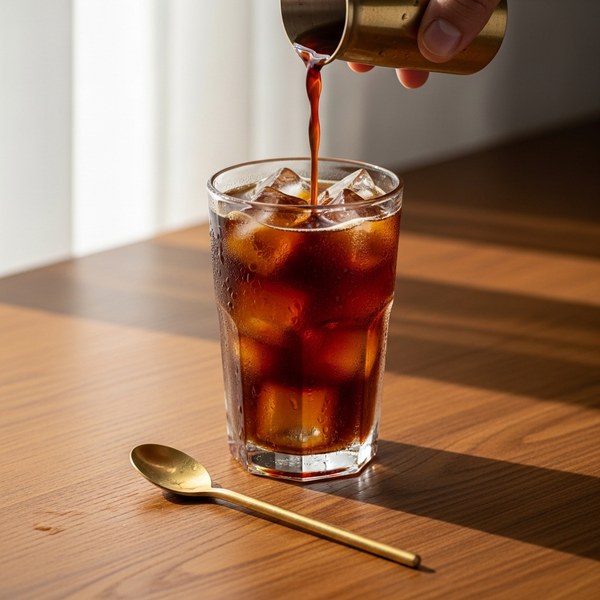
If you brewed concentrate at the 1:8 or 1:10 ratio above, you need to dilute before serving. The standard dilution is one to one. Equal parts concentrate and water (or milk).
To serve, fill a glass with ice. Pour in equal parts concentrate and water or milk. Stir. Drink. That is the entire serving routine.
The dilution liquid is a small but real flavor choice. Water keeps it pure coffee. Whole milk gives it a heavy, sweet body that approaches a coffee dessert. Oat milk gives it a thicker mouthfeel without the dairy weight. Almond and soy do their own things. Try each one and decide which one you like.
If the diluted drink still tastes too strong, dilute more. There is no rule that says 1:1 is correct. Some people prefer 1:2. Some people prefer concentrate over ice with no dilution at all, accepting that they are essentially drinking espresso-strength coffee cold. Adjust to what you like.
If you brewed ready to drink (1:15 ratio), skip the dilution entirely. Pour over ice and drink.
Storage and shelf life
Cold brew keeps in the fridge longer than any other home-made coffee, which is part of why people love it. Sealed in a clean container in the fridge, undiluted concentrate stays good for up to two weeks. Diluted cold brew (after you have mixed it with water) is good for about a week.
Sealed is important. If the container is open to the fridge air, the coffee picks up smells from everything else in there. A jar with a lid or a carafe with a cap is fine. A bowl with plastic wrap is not.
You will notice the flavor changes slightly over the storage period. The first few days are the brightest. By the end of week two, the concentrate has softened and lost some of its top notes. It is still good. It is not as good as day one.
Ten mistakes that ruin home cold brew
1. Grinding too fine. Fine grinds over-extract and pass through filters. Use a coarse French press grind.
2. Skipping the second strain. One pass through a sieve leaves fines in the liquid. A second pass through a paper filter or cheesecloth makes the difference between muddy and clean.
3. Using a 1:4 or 1:5 ratio. Too much coffee for the water makes a bitter, harsh concentrate. Start at 1:8 to 1:10.
4. Steeping too long. Past 24 hours, the drink turns harsh. More time does not equal more flavor.
5. Drinking concentrate undiluted by accident. Concentrate is strong by design. If your batch tastes terrible, try diluting it 1:1 with water before deciding the recipe failed.
6. Using old or stale beans. Cold brew does not hide stale coffee. It actually highlights it. Use beans roasted within the past month.
7. Bad water. If your tap water tastes off, your cold brew will taste off. Use filtered water.
8. Leaving it on the counter for 18+ hours. Room temperature accelerates extraction. Counter brews should top out at 16 hours.
9. Storing in an open container. Cold brew picks up fridge smells. Seal it.
10. Not stirring at the start. Dry pockets in the grounds mean uneven extraction. Stir or shake the jar after combining so every ground is wet.
14 day free trial. No credit card required.
Frequently asked questions
Does cold brew have more caffeine than hot coffee? Concentrated cold brew has significantly more caffeine per ounce because the ratio of coffee to water is much higher. Once diluted to drinking strength, the caffeine content is usually a bit higher than a standard cup of drip but not dramatically so.
Can you make cold brew with hot water? If you brew with hot water, you are making a different drink. The chemistry is different and the result is closer to hot coffee that has been chilled than to true cold brew.
What beans are best for cold brew? Medium to dark roasts work best for traditional cold brew flavor. The chocolate, caramel, and nut notes that cold brew highlights tend to come through more clearly in those roast levels.
How long does homemade cold brew last in the fridge? Sealed concentrate stays good for up to two weeks. Diluted cold brew is good for about a week.
Why is my cold brew bitter? Usually one of three things: grind too fine, steep too long, or ratio too coffee-heavy. Fix any of those and the bitterness goes away.
Can you make cold brew without a special maker? Yes. A mason jar and a fine mesh sieve plus a coffee filter is all you need.
What is the difference between cold brew and nitro cold brew? Nitro cold brew is the same drink with nitrogen gas infused into it. The nitrogen creates a creamy texture and a thick foam head. The underlying coffee is identical.
How do you sweeten cold brew? Use simple syrup. Granulated sugar does not dissolve in cold liquid. Simple syrup, honey, and maple syrup all dissolve cleanly.
Can you reuse cold brew grounds? Technically yes, practically no. The second batch will be weak and not worth the effort.
Is cold brew healthier than regular coffee? It is lower in acidity, which is easier on sensitive stomachs. Otherwise the health profile is similar.
The point of making it at home
Cold brew at a coffee shop costs five to seven dollars. A pound of beans that produces a gallon of concentrate costs eighteen to twenty four dollars. Once diluted, a gallon of concentrate yields roughly thirty servings. That works out to less than a dollar per drink, made with whatever beans you actually like.
The home version also lets you tune everything. Stronger or weaker. Sweeter or drier. Whole milk or oat. Whatever the version is that you actually want, you can build it without explaining it to a barista.
If you do still want to support the cafes where you live, Pulled Coffee pays you back real cash for every check-in at any coffee shop. Drink the cafe version on Saturday, drink the home version Monday through Friday, and the app counts both. See how the challenges work or read how members are earning money drinking coffee in 2026.
Get Pulled.
Earn up to $10,000 exploring coffee shops. Real cash. Real shops. Real rewards.
Download PulledRelated reading: Pour over vs espresso vs cold brew, specialty coffee vs chain coffee, the best coffee cities in America, what is third wave coffee, how to find specialty coffee shops near you, the best coffee apps in 2026.
Make the coffee, then pull the cafe. Download Pulled.
Our Picks
What we'd buy on Amazon for this
Hario · Mizudashi Cold Brew Pot, 1L
The right tool for ready-to-drink cold brew rather than concentrate.
$20.09
View on Amazon →OXO · Good Grips Cold Brew Coffee Maker
The rainmaker lid distributes water evenly across the bed, which the Toddy and Mizudashi do not.
$59.95
View on Amazon →Hario · V60 Fretta Iced Coffee Maker
The dedicated Japanese iced coffee setup.
$23.95
View on Amazon →


Pulled may earn a commission on purchases. Cookie applies to all Amazon items in your next 24 hours, not just this product.
See all Pulled Picks →Keep going with Pulled